
InsForge now supports database migrations.
Starting with v2.0.7, successful migrations appear in Database Studio, giving your project a clearer record of how the schema changed over time. And if you build with AI agents, InsForge Skills plus the InsForge CLI make it easier to keep migration work inside the same workflow as the rest of your backend changes.
Why Migrations Matter
Schema changes are easy to make and surprisingly easy to lose track of.
Without a clear migration workflow, teams often end up with one-off SQL changes, scattered notes, and very little visibility into what actually shipped. That gets even messier when multiple developers or coding agents are involved. You want the database to evolve quickly, but you also want a reliable history of the changes that were successfully applied.
Database migrations make that process more structured. Instead of treating schema changes like throwaway setup work, they become part of the normal development loop.
What Was Added
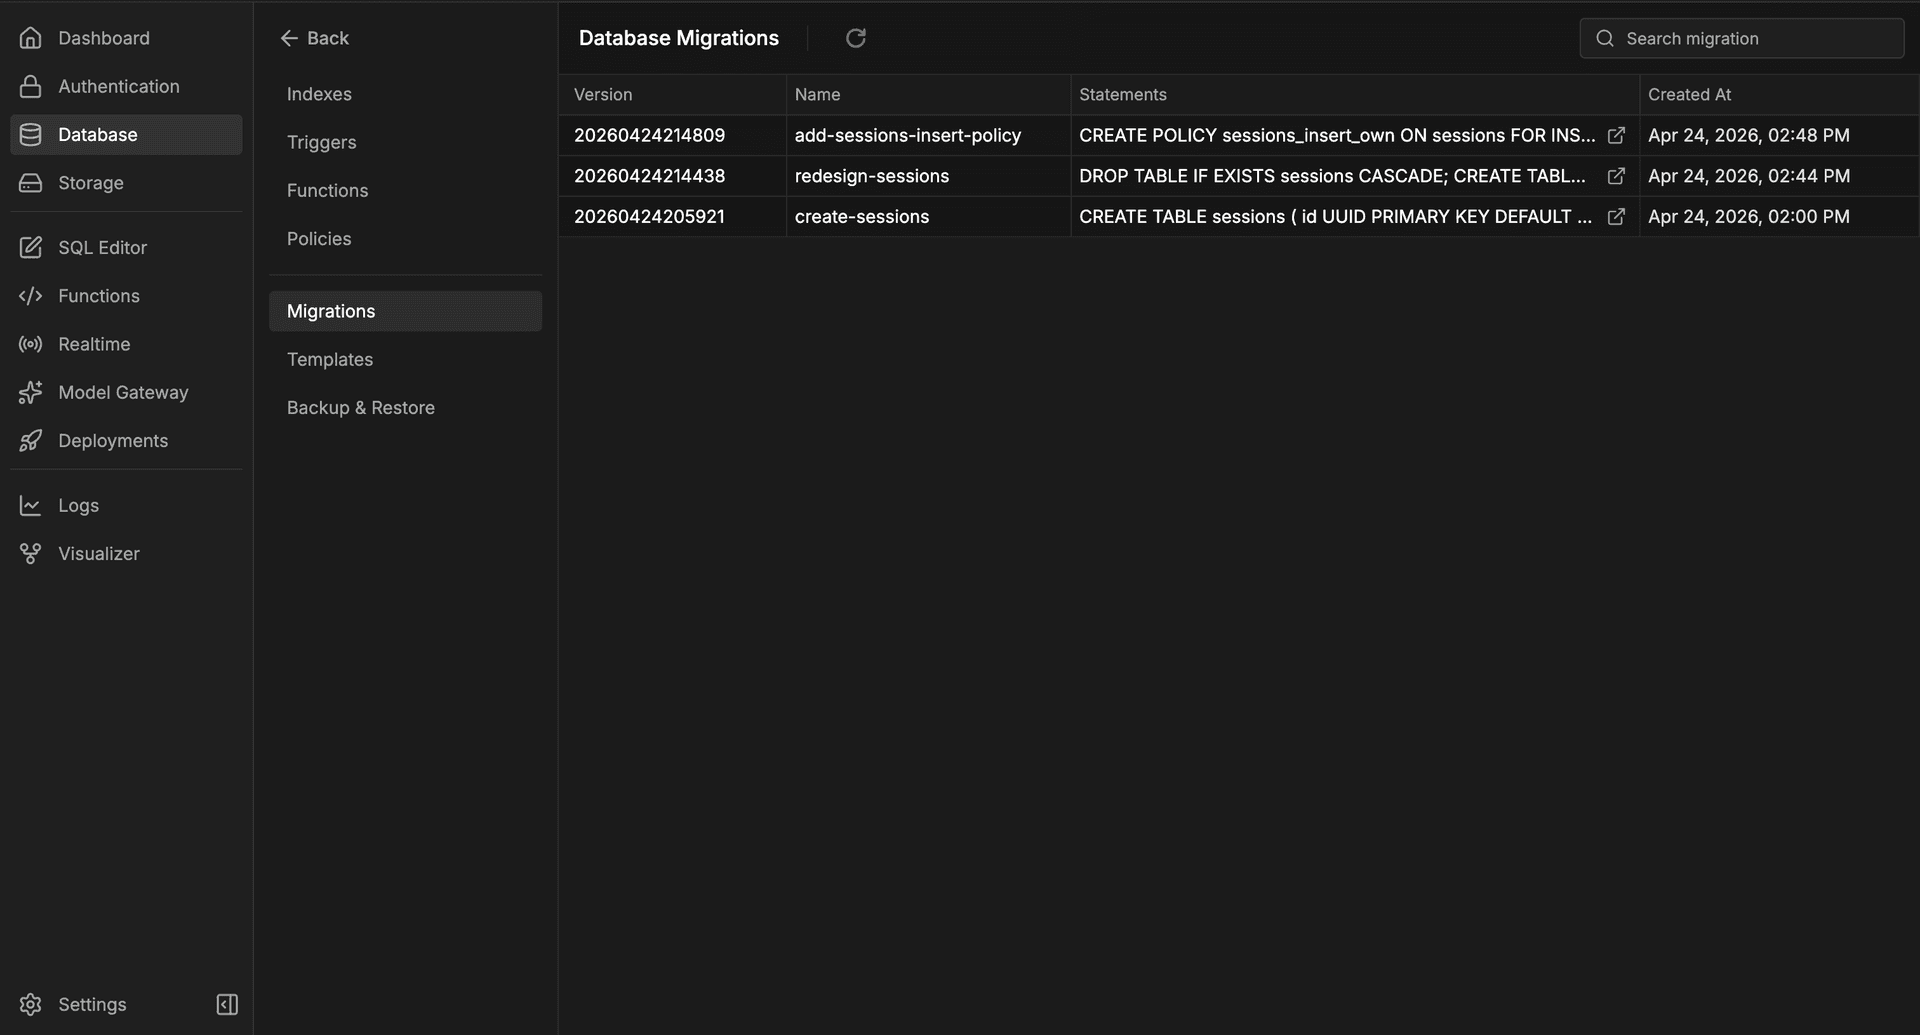
InsForge now includes a dedicated Migrations view under Database -> Database Studio -> Migrations.
From that page, you can review:
- The migration number
- The migration name
- The executed SQL statements
- The timestamp for when the migration was applied
Only successful runs are added to the history, so the page stays focused on the schema changes that actually landed.
That gives developers a simple place to inspect applied changes without digging through logs or reconstructing what happened from memory.
Database Migrations in the CLI
InsForge also ships a dedicated database migrations command group in the CLI, so you can manage migration files and applied history from the terminal.
The workflow is simple:
insforge db migrations listshows the migrations already applied remotely.insforge db migrations fetchpulls remote migration history into local.sqlfiles undermigrations/.insforge db migrations new <migration-name>creates a new local migration file with the correct timestamp-based name.insforge db migrations up <target>applies one local migration by filename or version.insforge db migrations up --to <target>applies pending migrations up to a chosen file or version.insforge db migrations up --allapplies every pending local migration.
That gives you a clean loop for inspecting history, syncing remote state into local files, creating new migrations, and applying them when they are ready.
If you build with a coding agent, InsForge Skills can guide the agent through this CLI workflow automatically.
Get Started
- Open your project dashboard
- Go to Database -> Database Studio -> Migrations
- Link your local project with
npx @insforge/cli link --project-id <your-project-id> - Use InsForge Skills and the CLI in your normal development workflow as your schema evolves